
Protecting Your Shoulders and Lower Back on Extended Sea Kayak Trips
Why Expedition Days Should Not End in Aching Joints
Long sea-kayaking days have an obvious appeal. You may be imagining quiet water outside a rocky headland, a loaded boat gliding between islands, and the steady rhythm of paddle strokes carrying you towards a remote campsite. The less attractive reality can arrive several hours later: tired shoulders, a stiff lower back, tingling legs and a cockpit position that suddenly feels much less comfortable than it did at the launch.
Those symptoms are not simply the unavoidable price of touring. Some fatigue is normal, particularly when you are increasing distance or carrying expedition equipment, but recurring pain often points to a problem with fit, posture or stroke mechanics. A loose cockpit can make you brace with your back. A high backrest can restrict rotation. An arm-dominated stroke can place repeated stress on the rotator cuff. The good news is that small changes often make a substantial difference.
The physical therapy perspective is useful here because it focuses on joint longevity rather than short-term performance. Your kayak should support an active, neutral posture, while your legs, pelvis and trunk should help transfer power through the boat. Sustainable paddling is not about sitting rigidly or avoiding movement. It is about creating enough contact and control that your spine and shoulders are not forced to compensate for poor alignment over thousands of strokes.
Dialing Cockpit Contact Points for Spine Support
A well-fitted cockpit lets you move the kayak with your whole body. Your feet, thighs, hips, seat and backband should work together, giving you control without squeezing you into an immobile position. When the cockpit is too loose, the boat can roll and yaw beneath you while your upper body tries to remain stable. In a following swell, that lack of connection may encourage you to slump, grip with your shoulders or use your lower back to absorb movement.
The aim is an active neutral pelvis. Sit tall enough for your ribcage to remain over your pelvis, but do not force your chest upwards or arch your back. Your feet should make firm contact with the footpegs, your knees should have useful support beneath the thigh braces, and your heels should remain comfortable rather than pressed aggressively downwards. A slightly open, relaxed hip position usually allows better torso rotation than a cramped seat.
The backband should support the lower back and stop you sliding backwards, not act like a large armchair backrest. If you constantly lean into a high backrest, your pelvis may tuck underneath you and your ability to rotate can diminish. Guidance on preventing canoeing and kayaking injuries also highlights the importance of correct positioning and sensible preparation for reducing avoidable joint strain.
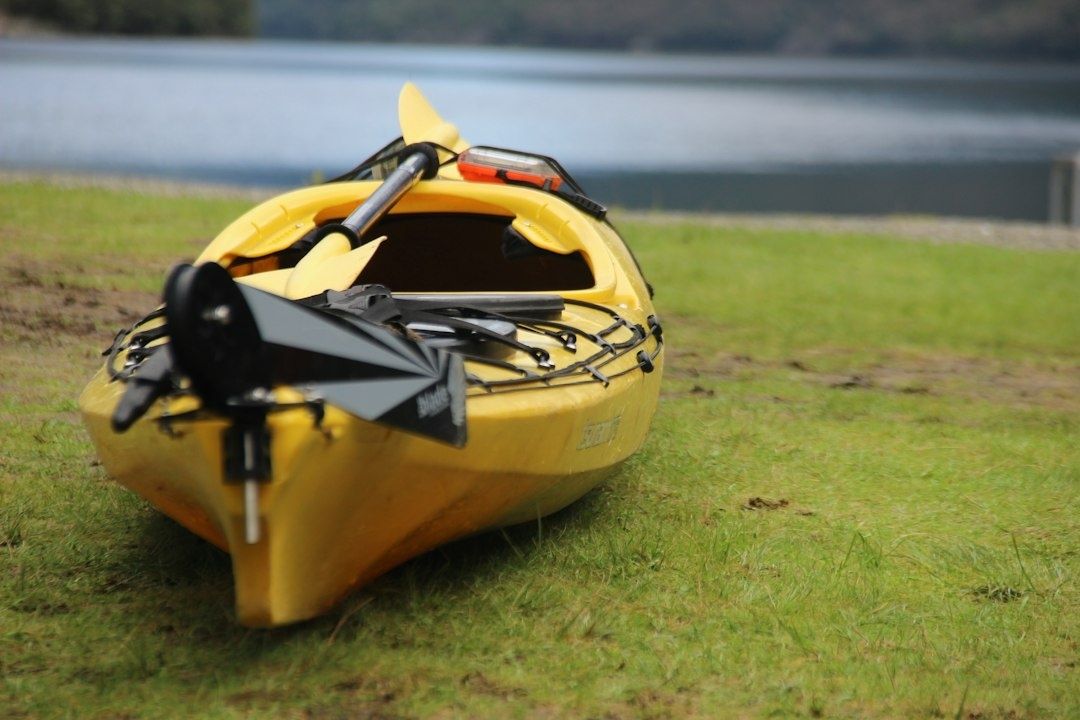
Make adjustments gradually and test each change on calm water. Before a long journey, use the following sequence:
- Set the footpegs so your knees remain slightly bent and your feet stay connected without locking the joints.
- Adjust the backband low enough to support the lumbar area while leaving your upper back free to rotate.
- Check that you can sit upright without leaning heavily against the backband.
- Add thin foam to the thigh braces if your knees move excessively, but retain enough room for an easy wet exit.
- Improve heel or foot support if your feet slide away during edging or forward strokes.
- Cover sharp hardware and pressure points before they create numbness or local irritation.
- Enter and exit the kayak after every modification to confirm that safety has not been compromised.
Foam padding should create useful contact rather than clamp your legs in place. The front of the hips and thighs need room to move as you rotate, and the cockpit must still allow you to release your legs quickly in a capsize. Try new padding on a short outing first. A comfortable adjustment in the driveway may feel restrictive after two hours of paddling.
Powering the Forward Stroke Through Core Mechanics
An arm-driven forward stroke looks simple, but it asks relatively small and vulnerable structures to repeat the hardest part of the work. The paddler reaches forward, catches the water, bends the elbow and pulls the blade back mainly with the shoulder and arm. As fatigue develops, the shoulder may rise towards the ear, the wrist may bend and the lower back may twist or collapse to create extra reach.
A torso-powered stroke uses a different sequence. The blade enters near the feet, and the paddler unwinds the trunk while the legs and pelvis provide a stable base. The abdominal muscles and obliques help manage rotation, while the larger muscles around the back and hips contribute to force transfer. The hands guide the paddle, but they should not carry the entire load. Think of the arms as links in a chain rather than the engine of the boat.
Research on sprint kayakers has connected abdominal muscle activity and coordinated trunk action with paddling performance. The study involved a small group of international-level paddlers, so its findings should not be treated as a complete prescription for recreational touring. It does, however, support a useful principle: efficient paddling depends on coordination between the trunk, legs and upper body, not isolated shoulder pulling.
A related six-week study found that adding Dynamic Neuromuscular Stabilization exercises to usual training increased maximum paddling force in the intervention group, although it did not produce a significant improvement in reported shoulder-girdle symptoms compared with control training. The findings from the kayak paddling force study suggest that core-focused work may support force production, but it is not a guaranteed treatment for pain. Persistent symptoms still deserve assessment by a qualified clinician.
| Common error | More joint-friendly alternative |
|---|---|
| Pulling hard with a bent elbow | Keep the pulling arm relatively long and rotate the torso towards the stroke side |
| Reaching by rounding the lower back | Reach from the upper back and shoulder blade while maintaining a stable pelvis |
| Holding the shoulders high near the ears | Relax the neck and keep the shoulder blades controlled rather than shrugged |
| Finishing the stroke behind the hip | Exit near the hip and prepare the next stroke before the blade travels too far back |
| Using the hands to steer every correction | Use torso rotation, leg pressure and subtle edging where appropriate |
On an extended crossing, avoid chasing a powerful stroke that cannot be repeated comfortably. A quiet, connected stroke with a clean exit is usually more valuable than a forceful pull that makes the shoulder complain. Alternate your attention between relaxed grip, blade entry, torso rotation and leg contact. Small technical reminders can prevent fatigue from turning into poor movement.
Setting Up the Paddler Box to Protect the Rotator Cuff
The paddler”s box is an informal way of describing the protective relationship between the hands, forearms, elbows and shoulders during a stroke. Keep the elbows comfortably bent, the hands within a sensible working area and the shoulders below the ears. This position helps prevent the arm from being forced into extreme overhead or behind-the-body angles, where the rotator cuff and long head of the biceps tendon may be exposed to repeated irritation.
Choppy water can make this difficult. A rushed low brace with a high, straight arm may load the shoulder suddenly, especially if the blade catches a wave or the paddler reaches too far behind. Sweeps can also become risky when they are performed with a locked elbow and a shoulder pulled far back. The solution is not to avoid bracing or turning, but to keep the movement compact, controlled and connected to the trunk.
- Before each stroke, check that your shoulders are relaxed and your grip is light enough to allow small corrections.
- Keep the upper arm in a comfortable relationship with the ribcage rather than lifting it aggressively towards shoulder height.
- Allow the elbows to bend naturally instead of locking them while the blade is loaded.
- Keep the wrists mostly neutral, avoiding repeated sharp bends during the catch and pull.
- For a brace, move the paddle with the torso and hips while keeping the hands within a controlled range.
- Exit the stroke before the blade passes well behind the hip, then reset rather than forcing extra length.
- If pain, weakness or a feeling of instability appears, stop treating the symptom as ordinary fatigue and seek professional advice.
Strength and mobility away from the water can help, but more exercise is not automatically better. Controlled rowing movements, external rotation work, push-ups and shoulder-blade control may be useful when they suit your current condition. Build gradually, warm up before hard training and avoid copying rehabilitation exercises without considering an existing injury.
In-Cockpit Mobility Resets During Long Crossings
Even a good cockpit becomes tiring if you remain in one position for hours. Static sitting reduces the number of small movements that normally keep the hips and lower back comfortable. Hip flexors can become tense, the pelvis can drift into a tucked position and pressure can build beneath the thighs or around the sitting bones. Numbness is not a useful endurance test. It is a signal to change position, improve support or take a break.
Micro-movements can be performed without destabilising the kayak. Gently alternate pressure between the left and right sit bones, make a small pelvic tilt forwards and backwards, and briefly relax one knee before returning it to the thigh brace. Keep the movement subtle and maintain enough contact with the boat to remain secure. In calm conditions, a few slow breaths with the shoulders relaxed can also reduce the tendency to brace unnecessarily.
During a rafted break or a safe pause near shore, use a short reset rather than waiting until stiffness becomes severe:
- Sit tall and take several slow breaths, allowing the lower ribs to move.
- Extend one leg at a time only as far as the cockpit permits, then return it gently.
- Roll the shoulders backwards without forcing the range.
- Turn the head slowly from side to side to release neck tension.
- Place one hand on the deck or paddle shaft for support and make a gentle upper-body rotation.
- Change your seating pressure before restarting, checking that no strap, edge or foam pad is creating a painful hotspot.
Core training should also include control, not just maximum strength. The DNS research described earlier found a performance benefit without a clear change in self-reported shoulder symptoms, which is a useful reminder that better force production does not replace sound technique, boat fit, recovery and sensible pacing. A few movement resets on the water are valuable, but they cannot correct a severely unsuitable cockpit.
Pave the Way for Decades of Effortless Coastal Exploring
Protecting your shoulders and lower back on a long sea-kayak trip starts with details that may seem minor. A footpeg moved by a small amount, a backband lowered, a little foam added beneath a thigh brace or a stroke shortened before it reaches behind the hip can change how force travels through your body. These adjustments reduce the temptation to slump, grip or pull with the shoulders when the sea becomes tiring.
Postural awareness is not about holding yourself stiffly for an entire expedition. It means noticing when the pelvis has tucked, the shoulders have risen or the stroke has become arm-heavy, then making a calm correction. That awareness leaves more attention for navigation, weather, tide and the simple pleasure of moving through a living coastal landscape. Looking after your body is part of looking after your expedition, because discomfort can distract you from decisions that matter.
Test every cockpit change on short outings before committing to an island-hopping journey or a multi-day coastal route. Paddle in calm conditions, practise bracing and confirm that you can exit safely. Increase distance only when your body is recovering normally between sessions. If pain persists, becomes sharp, causes weakness or continues after rest, pause the trip plan and obtain individual advice from a physiotherapist or another suitably qualified health professional. Good preparation does not remove every challenge from the sea, but it gives you a far better chance of meeting those challenges with strength, comfort and confidence.
Comments Comments: 0
Comments are closed.